Testing Guide
Overview
This guide explains how to test the different parts of the system. This can be used to confirm that the system works following upgrades, new features, etc.
This guide can also be used as an introduction to how the system can be used.
The following test scenarios are explained:
- T1 Basic use
- T2 Templates
- T3 Publishing and planning
- T4 Themes
- T5 Screen layouts
- T6 External users
- T7 Campaigns
- T8 Shared playlists
- T9 Feed sources
T1 Basic use
Description
This guide tests that the user can log in, create content and show the content on a screen. The user will create a slide, a playlist and a screen and then make the slide be displayed on the screen.
This guide requires a user that has the ROLE_ADMIN role.
Steps
- Open the admin at
/admin. - Log in.
- If more than one tenant has been set up, choose one.
- You should now be on the page
/admin/slide/list(slide list). - Create a slide
- Click “Opret nyt slide”.
- You should now be on
/admin/slide/create. - Fill “Slidets navn” with a name you can recognize.
- Select “Billede og tekst” in “Vælg en skabelon til dit slide”.
- Fill “Overskrift på slide”.
- Fill “Tekst på slide”.
- Select “l” in “Tekststørrelse”.
- Upload an image under “Billeder”.
- Scroll to the bottom and click “Gem slide”.
- You should be redirected to the slide list at
/admin/slide/list. - You should be able to find the new slide in the list.
- Create a playlist
- Navigate to
/admin/playlist/listby clickingSpillelisterin the navigation. - Click “Opret ny spilleliste”
- You should now be on
/admin/playlist/create. - Fill “Spillelistens navn” with a name you can recognize.
- Select the slide created above in “Vælg en eller flere slides”.
- Scroll to the bottom and click “Gem”.
- You should be redirected to the playlist list at
/admin/playlist/list. - You should be able to find the new playlist in the list.
- Navigate to
- Create a screen
- Navigate to
/admin/screen/listby clickingSkærmein the navigation. - Click “Opret ny skærm”
- Fill “Skærmens navn” with a name you can recognize.
- Select “Fuld skærm” in “Skærmens layout”.
- Select the playlist created above in “Vælg en eller flere spillelister”
- Scroll to the bottom and click “Gem skærm”.
- You should be redirected to the screen list at
/admin/screen/list. - You should be able to find the new screen in the list.
- Navigate to
- Set up the screen
- Open the screen client at
/clientin another tab in the browser. - You should see an empty screen with an activation code in the bottom right corner.
- If already logged in from earlier you can log out the screen with
shift+ctrl+i. - Copy the activation code.
- Open the screen client at
- Activate the screen
- Open the the screen in the admin by clicking “Rediger”.
- You should be at a route like
/admin/screen/edit/[ID]. - Input the activation code in “Tilkoblingskode”.
- Click “Tilkobl skærm”.
- Check the content is displayed in the screen
- Open the screen tab again at
/client. - See that the slide is displayed.
- Open the screen tab again at
T2 Templates
Description
This guide tests that the different supported templates can be created. This guide assumes that all templates from https://github.com/os2display/display-templates/ have been added to the installation.
Steps
- “Anmeldelse” (expected result anmeldelse.png)
Use Case: Show a review of book, film, etc.- Navigate to
/admin/slide/create. - Fill “Slidets navn”.
- Select “Anmeldelse” from “Vælg en skabelon til dit slide”.
- Fill “Teksten til anmeldelsen”. Use different kinds of formatting available in the text editor.
- Upload an image under “Billede”.
- Fill “Forfattertekst”
- Upload an image under “Billede”.
- Click “Gem slide”
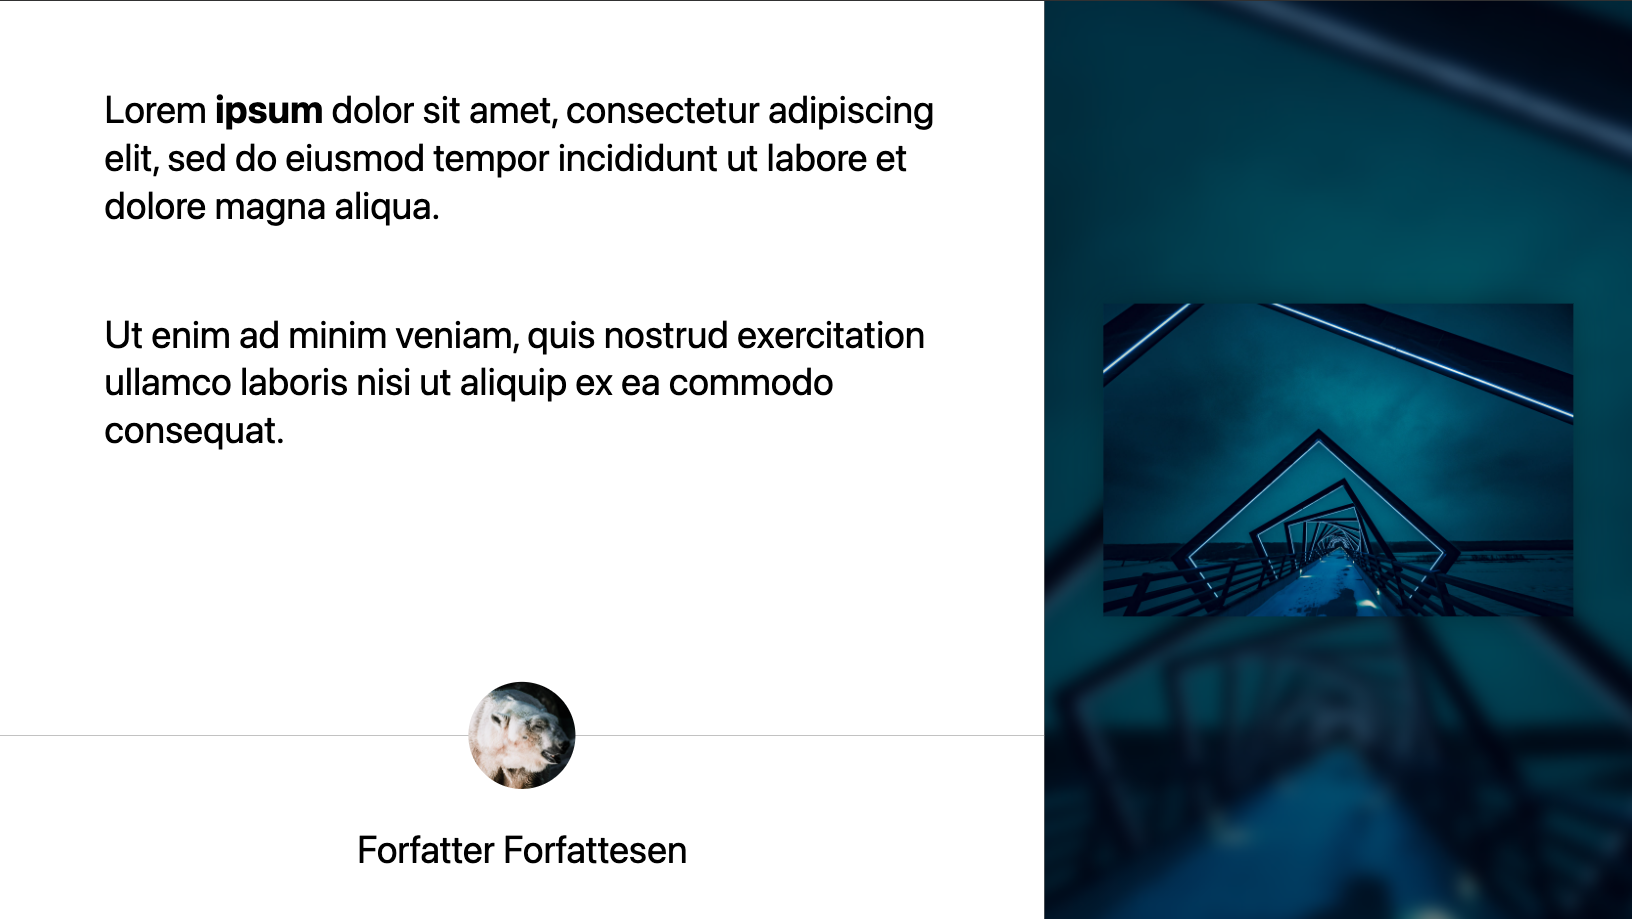
- “Billede og tekst” (expected result billede-og-tekst.png)
Use Case: Show image(s) and/or text.- Navigate to
/admin/slide/create. - Fill “Slidets navn”.
- Select “Billede og tekst” from “Vælg en skabelon til dit slide”.
- Fill content into the “Indhold” fields. Start with a single image in “Billeder”.
- Test different setting under “Opsætning”.
- To see the result of the different settings use the “Åben preview i fuld skærm”.
- Add an extra image under “Billeder”.
- Open the preview to see that the background image changes.
- Enable “Deaktiver fade ved flere billeder” and see in the preview that the fade effect gone between images.
- NB! The settings regarding logo are dependent on setting a theme with a theme logo. This will be tested in T4.
- Click “Gem slide”.
- “Iframe” (expected result iframe.png)
Use Case: Show content from an external url.- Navigate to
/admin/slide/create. - Fill “Slidets navn”.
- Select “Iframe” from “Vælg en skabelon til dit slide”.
- Fill “URL til iframe”. E.g. https://www.os2.eu/.
- Open the preview and see that the webpage pointed to is shown in the slide.
- Click “Gem slide”.
- “Instagram feed”
Use Case: Show data from an instagram feed.- NB! This guide assumes that a feed source supplying “instagram” data being installed for the selected tenant.
- NB! The feed will not supply data until after the slide has been saved, so it cannot be previewed before saving the slide.
- Navigate to
/admin/slide/create. - Fill “Slidets navn”.
- Select “Instagram feed” from “Vælg en skabelon til dit slide”.
- Select the feed source as “Vælg datakilde” and the feed under “Vælg feed”.
- Select a duration in “Varighed pr. billede/video (i sekunder)”.
- Fill “Hashtag-tekst”.
- Click “Gem slide”.
- “Kalender”
Use Case: Show calendar events in different layouts.- NB! This guide assumes that a feed source supplying “calendar” data has been installed for the selected tenant.
- NB! The feed will not supply data until after the slide has been saved, so it cannot be previewed before saving the slide.
- Navigate to
/admin/slide/create. - Fill “Slidets navn”.
- Select “Kalender” from “Vælg en skabelon til dit slide”.
- Select the feed source as “Vælg datakilde” and the feed under “Vælg feed”.
- Select a resource in “Vælg resurser”.
- This template support different layouts. Try different options under “Vælg layout”.
- Some of the options under “Konfigurér slide” only apply to specific layouts.
- Click “Gem slide”.
- Open the slide again.
- Test different layouts and settings. See the effects in the preview.
- “Kontakter”
Use Case: Display a list of people available for contact.- Navigate to
/admin/slide/create. - Fill “Slidets navn”.
- Select “Kontakter” from “Vælg en skabelon til dit slide”.
- Click “Tilføj kontakt”
- Add an image.
- Fill the fields: “Titel”, “Navn”, “Telefonnummer”, “E-mail”.
- Add a few more contacts.
- Save the slide.
- See that the data is displayed correctly.
- “Plakat”
Use Case: Display a poster for an event- NB! This guide assumes that a feed source supplying “poster” data has been installed for the selected tenant.
- The slide can be configured to show a single occurrence of an event, or subscribe to events for given selections.
- Navigate to
/admin/slide/create. - Fill “Slidets navn”.
- Select “Plakat” from “Vælg en skabelon til dit slide”.
- Select the data source.
- Click “Enkelt” in “Vælg visningstype”.
- Search for an event.
- Click the event.
- If more than one occurrence appears, select one of them.
- Save the slide.
- See that the event is displayed.
- Try to override the different fields with “Vis overskrivningsmuligheder”.
- Create a new “Plakat” slide.
- Click “Abonnement” in “Vælg visningstype”.
- Test the different filters. Find a case where multiple events appear.
- Save the slide.
- See that the expected events are shown in the slide.
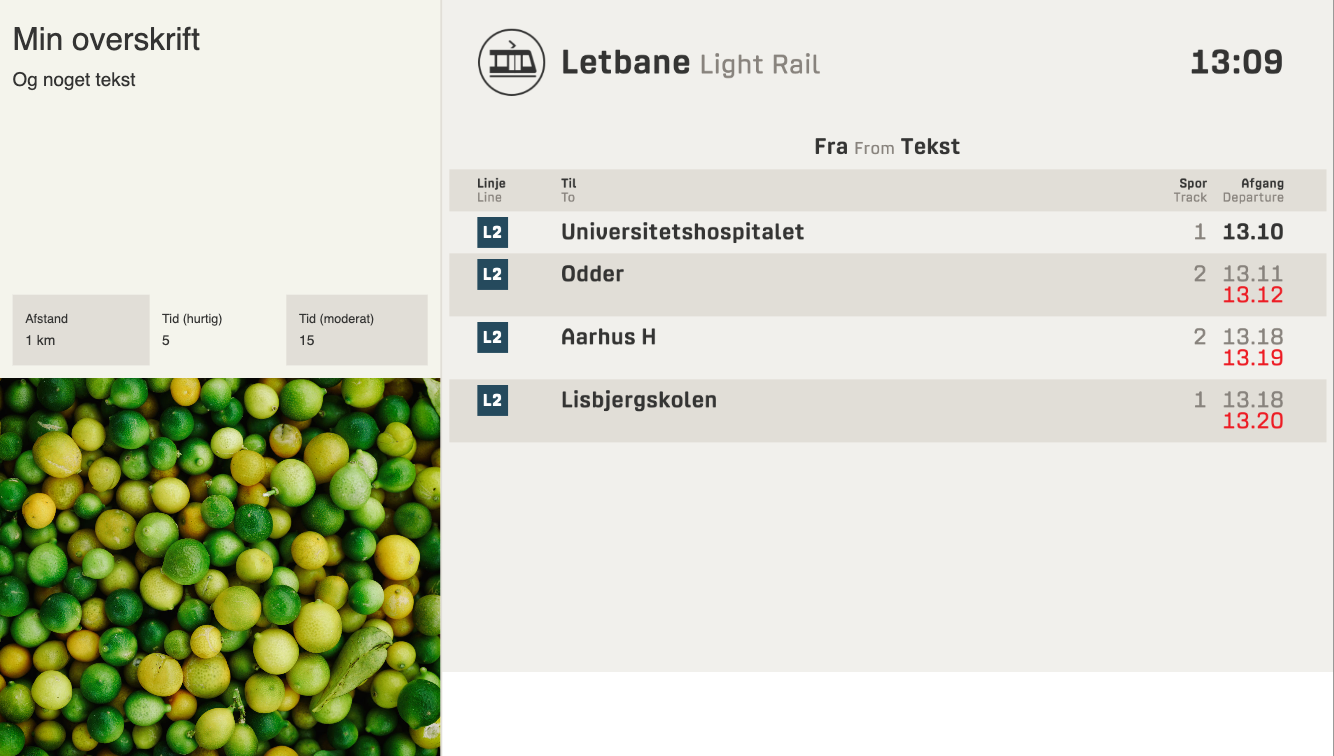
- “Rejseplanen” (expected result rejseplanen.png)
Use Case: Show which public transportation is available from a given location with rejseplanen.dk.- NB! This guide assumes that the admin has been configured with a valid rejseplanen api key. See example config: https://github.com/os2display/display-admin-client/blob/develop/public/example_config.json#L4
- NB! The part that displays departures is an iframe from rejseplanen from the stops selected.
- Navigate to
/admin/slide/create. - Fill “Slidets navn”.
- Select “Rejseplanen” from “Vælg en skabelon til dit slide”.
- Fill the different text fields.
- Add a map of how to get to the stop.
- Find a stop with “Vælg stoppested”.
- Fill “Antal afgange der skal vises” and “Er det valgte stoppested bus eller letbane”.
- Save the slide.
- See that the slide displays the expected content.
- “RSS”
Use Case: Display latest news from an RSS feed.- NB! This guide assumes that a feed source supplying “rss” data has been installed for the selected tenant.
- Navigate to
/admin/slide/create. - Fill “Slidets navn”.
- Select “Rss” from “Vælg en skabelon til dit slide”.
- Select the data source from the dropdown.
- Fill an rss feed url into “Kilde”. E.g. https://www.dr.dk/nyheder/service/feeds/senestenyt
- Fill 5 into “Antal indgange” and “Varighed pr. indgang”.
- Select a background image and a text size.
- Save the slide.
- See that data is displayed in the slide.
- “Slideshow”
Use Case: Display multiple images after each other with transitions between.- Navigate to
/admin/slide/create. - Fill “Slidets navn”.
- Select “Slideshow” from “Vælg en skabelon til dit slide”.
- Upload multiple images.
- Select “Varighed pr. billede”.
- Choose “Zoom mod midten” from “Vælg animation”.
- Choose “Cross fade” from “Vælg overgang”.
- Save the slide.
- See that the expected result is displayed in the slide.
- Experiment with different animations and transitions.
- “Tabel”
Use Case: Display tabel data, which is manually created or supplied by an API endpoint.- Navigate to
/admin/slide/create. - Fill “Slidets navn”.
- Select “Tabel” from “Vælg en skabelon til dit slide”.
- Create multiple columns and rows with the tool under “Indtast tabeldata”.
- See that the data is presented correctly.
- “Video”
Use Case: Show an uploaded video.- NB! For the video to autoplay with sound the browser has to be configured to allow this. See https://developer.chrome.com/blog/autoplay.
- Navigate to
/admin/slide/create. - Fill “Slidets navn”.
- Select “Video” from “Vælg en skabelon til dit slide”.
- Upload a video.
- Save the slide.
- See that the video is played back without sound.
- Activate “Afspil lyd” and save.
- See that the video is played back with sound.
- Follow the steps from T1 for adding the slides to a playlist and screen.
- See that the templates display correctly.
T3 Publishing and planning
Description
This guide tests the different publishing and planning options available.
A slide/playlist can be restricted in publishing period. If no publishing is set the default is that the slide/playlist is published. If you wish to limit the period the slide/playlist is published you can set publishing from,to dates.
A playlist can also use planning rules. These resemble the recurrence rules you can set for a calendar event in most calendar programs. An example of planning can be “every monday at 12:00” with a duration of 1 hour.
Steps
- Create a slide, playlist, screen. See T1.
- Slide publishing
- Confirm that the slide is displayed in the client
/client. - Set “Udgivet fra” to a future date. Save the change.
- Confirm that the slide is NOT displayed in the client
/client. - Set “Udgivet fra” to a past date. Save the change.
- Confirm sure the slide is displayed in the client
/client. - Set “Udgivet til” to a past date. Save the change.
- Confirm that the slide is NOT displayed in the client
/client. - Set “Udgivet til” to a future date. Save the change.
- Confirm sure the slide is displayed in the client
/client.
- Confirm that the slide is displayed in the client
- Playlist publishing
- Repeat the steps from “Slide publishing” for the playlist.
- Playlist slide ordering.
- Add several slides with different publishing dates set, to the playlist. Try different scenarios, where the slide is published now, in the future, in the past.
- See how the fields “Udgivelse fra”, “Udgivelse til”, “Status” reflect the publishing dates set for the slides in the list “Afspilningsrækkefølge”.
- Try to change order of the slides in “Afspilningsrækkefølge” by clicking the “↓” arrows.
- See that the order is sorted according to “Udgivelse til” or “Status”.
- Playlist planning
- Click “Tilføj” under “Planning” in the playlist (
/admin/playlist/edit/[ID]). - NB! Planning is handled by setting up a RRule.
- Test different setups for “Gentag”.
- For each scenario:
- Choose “Start” and “Slut” so the occurrence will have a duration of 1 hour.
- Click “Gentag planlægning” to set up repetition rules.
- Test that the rule applies to the playlist by creating a scenario where the playlist should be shown.
- Save the playlist.
- Open the client at
/clientand see that playlist is shown. - Change the planning to a scenario where it should not be shown.
- Save the playlist.
- Open the client at
/clientand see that playlist is NOT shown.
- Select “År” for “Gentag”.
- See that the occurrences will be the every year at the given “Start” in the list of coming occurrences.
- Select “Valgte ugedage”
- Select “År” for “Gentag”.
- Select “Mandag” in “Valgte ugedage”.
- Select 5 in “Ugenummer”.
- See that the occurrences will be every year on monday in week 5.
- Select “Måned” for “Gentag”.
- Select some months in “Valgte måneder”
- See that the occurrences will be the selected months at the given time from “Start” in the list of coming occurrences.
- Select “Uge” for “Gentag”.
- For each scenario:
- Click “Tilføj” under “Planning” in the playlist (
T4 Themes
Description
This guide tests setting up a theme and applying it to a slide.
A theme modifies that look of slides. A theme can also supply a logo to slides.
Creating a theme requires that the user understands css. See https://github.com/os2display/display-templates/tree/develop/src/themes for examples of themes and description.
Steps
- Navigate to “Temaer” (
/admin/themes/list). - Click “Opret nyt tema”.
- Fill “Temaets navn”, “Temaets beskrivelse”.
- Fill “Temaets CSS” med
#SLIDE_ID h1 { color: red; } - Upload a logo in “Tilføj logo til temaet”.
- Create a slide with the template “Billede og tekst”. See T1.
- Edit the slide and set “Slidets tema”.
- See that the theme colors the “Overskrift på slide” red in the preview.
- Select “Vis logo fra tema”.
- Change “Logostørrelse”, “Logoposition” and “Margin om logo”.
- See that the logo is added to the slide in the preview.
- Click “Gem slide”.
- Test that the theme applies for the slide at
/client.
T5 Screen layouts
Description
This guide tests setting up screens with different layouts.
A screen can have different layouts. It can be split into different regions.
A special case of screen layouts is “touch-buttons” type for a region. See https://github.com/os2display/display-templates/blob/develop/src/screen-layouts/touch-template.json#L32. This converts slides shown in the screen region to buttons that display the slide when pressed. The button text is set in the slide in the section “Touch region”. This requires that touch button is enabled in the installation.
Steps
- NB! This guide assumes that the layouts in https://github.com/os2display/display-templates/tree/develop/src/screen-layouts are installed in the test installation.
- Create a screen.
- Fill “Skærmens navn”.
- Select “2-delt” in “Skærmens layout”.
- In “Spillelister tilknyttet regionen” two regions should appear.
- Select different playlists for the two regions.
- Save the screen.
- Open the screen in
/clientas described in T1. - See that the screen is split in the middle and displays the playlists selected.
T6 External users
Description
This guide tests inviting external users to the system using the OIDC external setup.
This guide assumes that the test installation has been configured to allow external users through OIDC login.
An external user can be allowed to create content in a tenant by using an activation code, created by an admin user in the given tenant.
In the following two different users will take part:
- The admin user that has access to create activation code for a given tenant (USER_ADMIN).
- The external user that should be allowed to work in the tenant (USER_EXTERNAL).
Steps
- Log in as USER_ADMIN in a tenant using “Medarbejder” login.
- Navigate to “Aktiveringskoder” (
/admin/activation/list). - Click “Opret ny”.
- Choose a name for the external user when they log in.
- Choose the role for the user: “Ekstern bruger”
- Save the activation code.
- You should see a list of created activation code.
- Copy the activation code.
- Log out of the system
- Login as external using MitID.
- Use the activation code.
- You should be logged into the tenant with
ROLE_EXTERNAL_USERpermissions.
NB! If you are already registered as an external user in the system, you will retain the name you were given with the first activation code. If you are already added to a tenant, you can be use an activation code to be added to another tenant in the top menu: “Tilføj” -> “Område”.
T7 Campaigns
Description
This guide tests applying campaigns to screens and screen groups. Screens can be added to a screen group.
Consider the following scenario: A group of screens normally contains some standard content. For one week they should show some different content (e.g. a festival for one week). Instead of manually removing the normal content and adding different content when the week starts and manually change back when the week is done, a campaign can be set up. The campaign will take over the screen for the selected period, and yield control when the period does not apply.
The campaign is a list a slides to show, start and end dates, and a list of screens or screen groups it should apply to.
Please note that a campaign applies the full area of a screen. It ignores the layout of the screen and applies as if the screen is running the full screen layout.
Steps
- Create a slide (SLIDE_1), playlist and screen (SCREEN_1). This should contain default content. See T1.
- Create another slide (SLIDE_2) that is different from the first.
- Campaign
- Navigate to “Kampagner” (
/admin/campaign/list). - Click “Opret ny kampagne” (
/admin/campaign/create). - Choose a name and description.
- Add SLIDE_2 in “Tilknyttede slides”.
- Add SCREEN_1 in “Skærme”.
- Select the campaign period in “Udgivelse”.
- Save the campaign.
- Test that the campaign applies/does not apply to SCREEN_1 according to the campaign period select.
- See T1 for setting up the screen SCREEN_1.
- Navigate to “Kampagner” (
- Screen group
- Create a screen group (GROUP_1) under “Grupper” (
/admin/group/list). - Create a new screen (SCREEN_2)
- Select GROUP_1 under “Grupper”.
- Save the screen.
- Edit the campaign created below
- Set GROUP_1 in “Skærmgrupper”.
- Save the campaign
- Test that SCREEN_2 displays the campaign.
- See T1 for setting up the screen.
- Create a screen group (GROUP_1) under “Grupper” (
T8 Shared playlists
Description
This guide tests sharing playlists across tenants.
The system consists of different tenants and content is not shared between the different tenants.
The exception to the rule is shared playlists. A playlist can be configured to be shared between tenants. When it is shared it can be displayed in another tenant, but not edited.
Steps
- NB! This guide assumes that more than one tenant is created the tenant and that the tester has access to both tenants.
- Create slide, playlist in one tenant (TENANT_1).
- Edit the playlist and select the other tenant (TENANT_2) in “Del denne spilleliste”.
- Save the playlist.
- Change tenant in the top left corner to TENANT_2.
- Navigate to “Delte spillelister” (
/admin/shared/list). - See that the playlist is in the list.
- Create a screen in TENANT_2.
- Select “fuld skærm” in “Layout”.
- In “Spillelister tilknyttet regionen” tick the box “Vis delte spillelister”.
- Attach the shared playlist.
- Save the screen.
- Test that the playlist is displayed on the screen. See T1 for how to activate the screen.
T9 Feed sources
Description
Feed sources are the link between external data source and slides. An example is the RSS feed. When creating a slide with the RSS template a feed source (“datakilde”) needs to be selected. After the feed source has been selected it is possible to input the url to the RSS feed to show data from. The feed source contains the code that calls the external source and converts data to a format the RSS template understands.
Feed sources are connected to a tenant. New feed sources can be connected to a tenant in through the “Datakilde” link in the navigation.
The following guide describes how to add a “calendar api” feed source to a tenant.
NB! The calendar api feed source has some installation requirements that are assumed to have been set up. See the documentation for further information.
With the calendar api feed source the administrator should select which locations are connected with the given tenant. When creating a slide with the given feed source, the resources that belong to the given locations are available to deliver data to the slide.
Steps
- Go to
/admin/feed-sources/list. - Click “Opret ny datakilde” (
/admin/feed-sources/create). - Select a name (e.g. “My calendar feed”) and add a description of the feed source.
- Select “Kalender feed” for “Type”.
- It will display “Bemærk! Datakilden skal gemmes før der kan tilkobles lokationer. Gem og åbn datakilden igen.”.
- Save with “Gem datakilde”.
- Reopen the feed source from the list.
- Select locations that should be connected with the given tenant.
- Save with “Gem datakilde”.
- Now the feed source should be available in the feed selector, when setting up a “calendar” slide.